Today you are going to learn EVERYTHING about swiss chard microgreens!
Right from how to grow them, what equipment you need, the health benefits of swiss chard microgreens, how to eat them, and much more.
Swiss chard microgreens are filled with antioxidants, vitamins, and calcium. Also, they are low in calories – making them a great addition to your keto diet.
Some growers refrain from growing swiss chard microgreens because of their hard seed hulls, but there is a quick and easy way to get rid of them and enjoy a good harvest of colorful and vivid swiss chard microgreens.
In this complete guide, we will see how to grow these microgreens easily and address a few questions that pester some growers and eaters as well.

How to Grow Swiss Chard Microgreens Under 14 Days?
Swiss chard microgreens are one of the quickly growing microgreens. You can grow a batch of them in 12 to 14 days.
Since they are one of the best-tasting microgreens, they have a high demand among microgreens eaters.
Here’s the swiss chard microgreen growing process at a glance:
| Day 1 | Sow the seeds in the soil and coco coir |
| Day 2 to Day 4 | Keep watering once a day |
| Day 5 to Day 6 | Blackout Period |
| Day 7 to Day 11 | Keep them under direct light/sunlight. Water lightly once a day. |
| Day 12 or Day 13 | Harvest |
Equipment needed to grow swiss chard microgreens at home:
| Tool | Our Recommendation |
|---|---|
| 20″ x 10″ Growing Trays | Without drain holes (2) With drain holes (1) |
| Water Spray (with adjustable settings) | Water Hose Nozzle (7 Adjustable Settings) |
| Swiss Chard Seeds | Rainbow Mixture Ruby Red |
| Coco Coir | Coco coir with low EC and pH by Plantonix. |
| Weighing scale | Etekcity Food Kitchen Scale |
| Growing Lights | UF1000 Grow Lights by Unit Farm |
| Sharp Knife (Optional) | Stainless Steel Knife by MosFiata |
| Ziploc Bags / Air Tight Containers | Ziploc Bags Air-tight Containers |
Now that you have all the equipment in place, let’s start growing swiss chard microgreens.
Step 1: Sow the Seeds (Day 1)
Take 25 grams of swiss chard microgreen seeds into a container.

Now, start preparing your growing trays. Take three trays – one with draining holes and two with no holes.
We will plant the seeds in the tray with draining holes. This way, we can keep a growing tray beneath it, and bottom-water our microgreens.
Spread soil on the growing tray. Do not fill up to the brim.
Start spreading the seeds evenly on your growing tray.
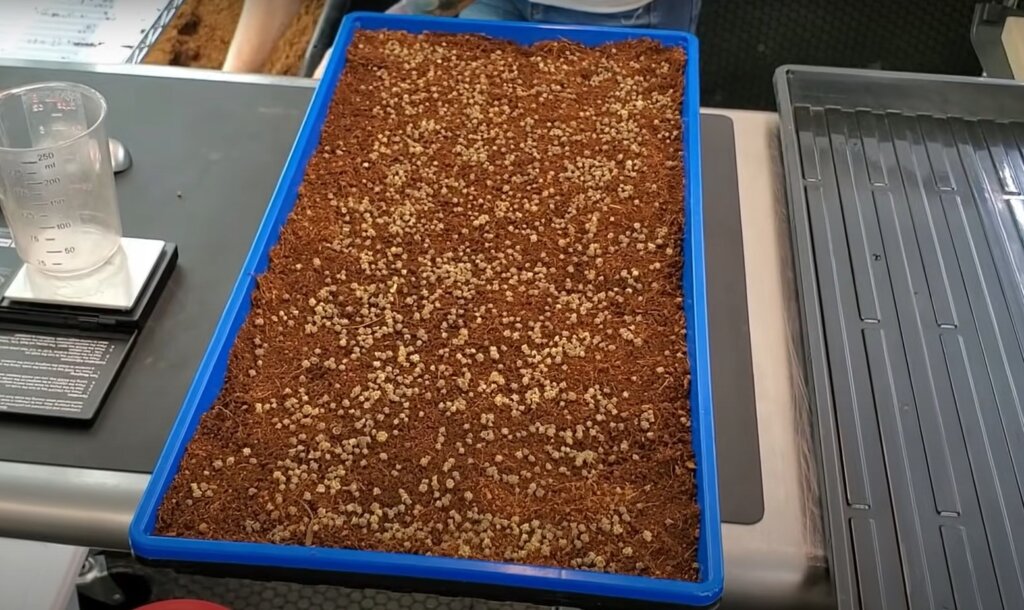
Add a layer of coco coir over the seeds. This will help the seeds in germination, and remove the seed hulls easily.
The light pressure of the coco coir also forces the seeds to grow deeper roots and absorb optimum water/nutrition from the bottom tray.

Once you add the coco coir layer, even out the surface to enable proper growth of the leaves.
Step 2: Watering the Seeds (Day 1)
When you water the swiss chard microgreens tray for the first time you need to water it heavily – but not heavy enough that water starts drizzling from the draining holes.
Use the water hose nozzle with low settings and water the seeds evenly.
This way, the soil is loosened creating more air pockets in the soil and allowing healthy growth of the roots.

🔔 Note: Soaking seeds is optional. If you want to soak swiss chard seeds, then do it for 24 to 48 hours before sowing them.
Once done watering, cover the growing tray with another tray and keep a light weight on the uppermost tray.
This way, the seeds will be pressed deep down into the soil and the hulls will easily be removed once the leaves start to sprout.
Step 3: Watering and Checking (Day 2 to Day 4)
From the next day onwards, you need to water the swiss chard microgreens lightly from ABOVE with the nozzle.
Make sure the settings are low so you don’t flood the growing tray.
After Day 3, you will start to see small sprouts. Water the upper surface lightly and this time cover the growing tray with the upper tray – BUT WITHOUT THE WEIGHT.
Otherwise, the microgreens will be bent or grow wriggly. We want them to grow as straight as possible. So, no weight after day 3.
By Day 4, you will start seeing the roots emerging from the draining holes. Lift the growing tray and bottom-water the swiss chard microgreens. Just a little, don’t over water.
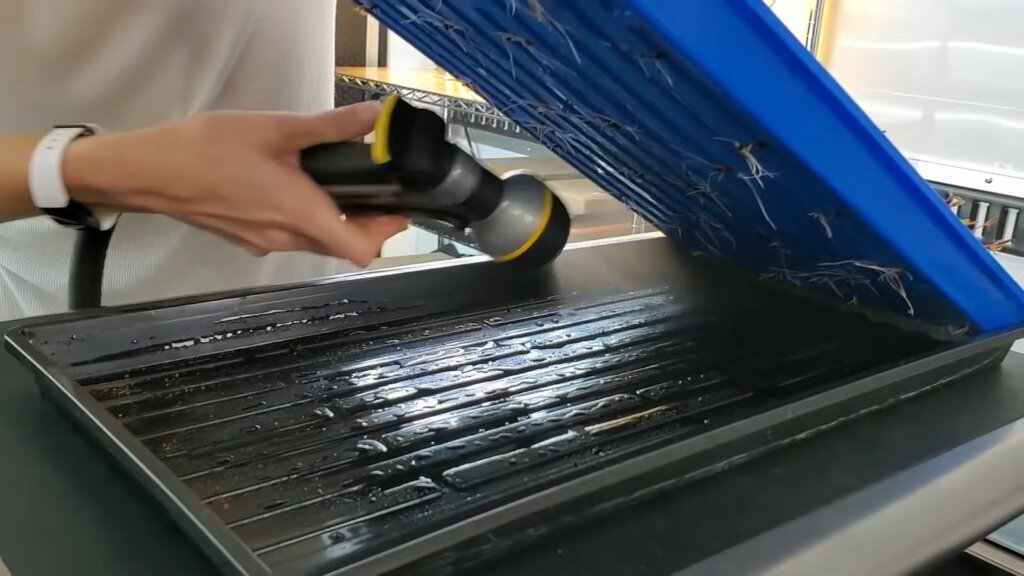
Mist the upper layer of soil with some water.
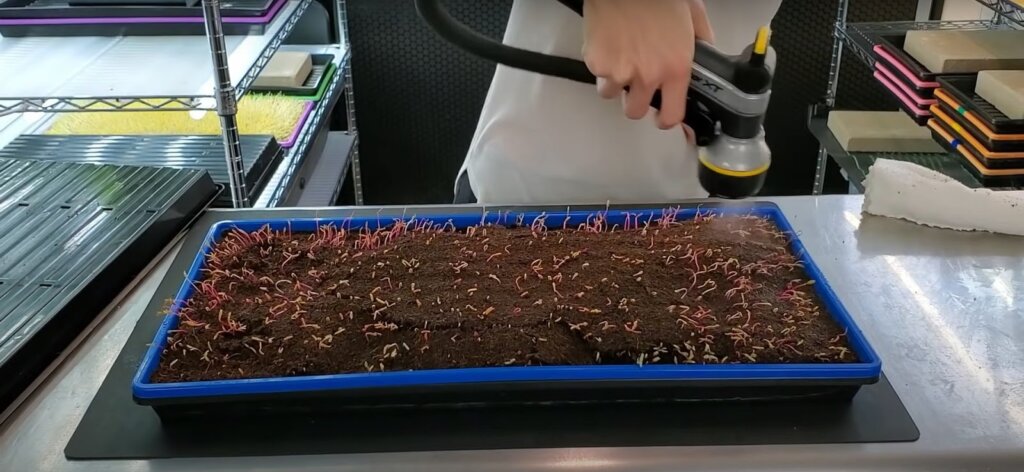
Step 4: Blackout Period (Day 5)
Now, turn the upper tray upside down and cover the growing tray like this.

This is called the Blackout period.
A blackout period essentially means keeping the seeds away from sunlight. This allows healthy germination and root growth.
Step 5: Watering and Keeping Under the Light (Day 6 to Day 12)
On Day 6, you can start keeping your microgreens under direct light. If you live in a country with sunny weather, you can grow these microgreens under direct sunlight as well.
4 to 6 hours of daily sunlight is enough.
However, if you are growing microgreens indoors with a light setup, we have a comprehensive guide for you that will tell you which is the best light for microgreens.
Anything under 4000k is a good light source for swiss chard microgreens.
Now, you do not need to cover the growing tray. Just keep the tray under the light and keep checking for water every day.
Every day, bottom-water the swiss chard microgreens with ½ cup of ocean water solution.

OceanSolution™ 2-0-3 is a liquid organic fertilizer that nourishes the soil and the roots of your microgreens.
Made by combining OS PURE with naturally sourced and OMRI-listed Nitrogen and Potassium, ocean solution encourages your plants to absorb more micro and macronutrients, which will boost growth, health, and nutrition.
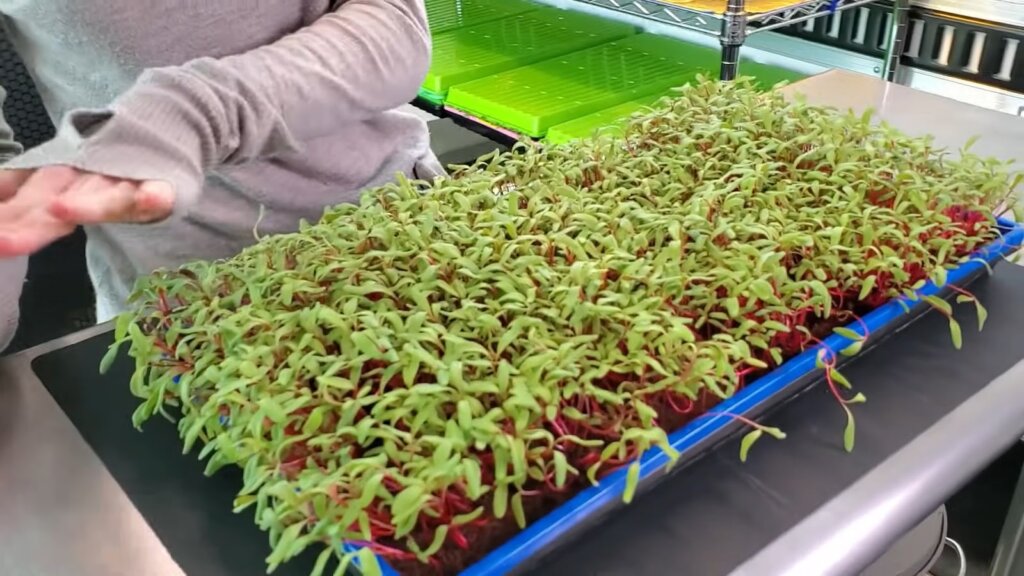
By Day 11 or 12, you will be able to see a healthy batch of swiss chard microgreens sprouting from the tray.
Step 6: Harvest and Store (Day 13)
On Day 13, you will be ready to harvest your swiss chard microgreens.
Take a sharp knife or a scissor and start cutting the microgreens. BE CAREFUL in this step.

Ensure you do not cut your swiss chard near the soil or you will get soil particles in your bowl of harvest. Just lightly hold a bunch of microgreens from the top and chop at the growing tray’s height.
This will give you a combination of contrasting red stems and green leaves.
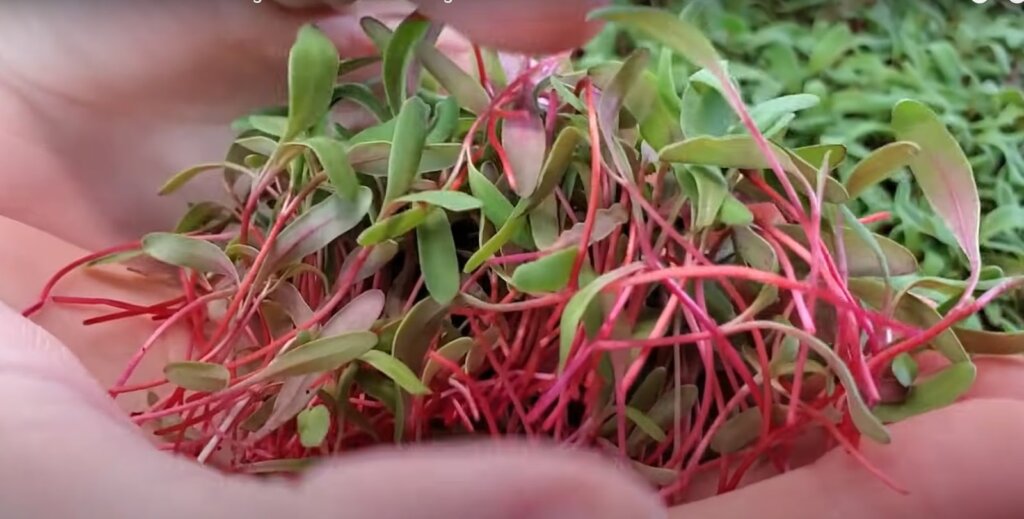
Your healthy batch of swiss chard microgreens is ready. Store them unwashed in a Ziploc bag or an air-tight container.
Put them in the freezer and take them out 5 minutes before you want to eat them.
🔔 Mandi and Christopher from On the Grow have shown the step-by-step process of growing Swiss chard microgreens in a limited space.
Do watch this YouTube video if you want to know more tips and tricks. All the images above are sourced from their video.
How to Store Swiss Chard Microgreens?
To store swiss chard microgreens – or any microgreens for that matter – lock them in an air-tight container or a Ziploc bag.
Seal the container tight or Ziploc bag. Make sure that you do not wash the microgreens before storing them. Wet microgreens will go damp in a few days and lose all the crunch and texture.
Microgreens just like any other fruits or vegetables have the highest nutrition and health benefits when they are fresh.
So, it is recommended that you eat them fresh. Wash them a little under the tap water to wash off the soil particles and throw them onto your dish.
However, if you have grown a large batch and want to store some for later. Keep a few things in mind:
- Do not wash before storing
- Do not store them cooked
- Keep them in an air-tight container or a Ziploc bag
We have created a complete guide on how to store microgreens. You can check it if you want to know more about storing your greens.
Popular Types of Swiss Chard Microgreens
You can grow any variety of swiss chard. However, Ruby Red and Rainbow Mix are two of the most popular varieties that you can try.
Below, you can see the beautiful rainbow mix swiss chard microgreens on the left, and ruby red on the right.

No matter which type of swiss chard microgreens you grow, the growing process that we discussed above is the same.
The nutritional composition of both rainbow mix and ruby red are similar. Both of these varieties are filled with Proteins, Calcium, Zinc, Potassium, Iron, and Vitamins like A, B, C, E, and K.
These two microgreens even taste similar – earthy and sweet.
However, where the rainbow mix and the ruby red varieties differ in their stem colors. The rainbow mix has colorful and a variety of vibrant green, red, purple, and yellow stems. On the other hand, ruby red is… ruby red!
Swiss Chard Microgreens Nutrients
The origin of the swiss chards is in the Mediterranean and thus you will see them used in Mediterranean cuisine for their nutritional properties.
According to a study published by the Royal Society of Chemistry, the observers noted high antioxidant patterns including tocopherols, carotenoids, and hydrophilic phenols in swiss chard microgreens among others.
Swiss chards are mainly composed of nutrients like proteins, iron, zinc, calcium, potassium, magnesium, and also vitamins like A, B, C, E, and K.
Swiss Chard Microgreens Health Benefits
The health benefits of microgreens are slowly getting known to everyone, it is one of the biggest reasons why so many people are adopting them into their meals nowadays.
Kale and Chard can be interchangeably used in your salads and both of them are said to have high lutein components.
Lutein is an antioxidant that is critical in protecting your skin and eyes.
Also, these greens are filled with zeaxanthin, which is an essential element in reducing the risk of macular degeneration, according to the American Macular Degeneration Foundation.
Other health benefits of swiss chard microgreens include:
- Immediate boost in better digestion
- Extremely helpful in preventing diabetes and high blood pressure
- Like mentioned, these microgreens have high levels of antioxidants which lowers the risk of chronic diseases like cancer.
Frequently Asked Questions
Can you grow Swiss chard microgreens indoors?
Absolutely, yes! You can grow swiss chard microgreens indoors or outdoors. Just make sure your lighting setup is appropriate for healthy growth.
What do Swiss chard microgreens taste like?
Swiss chard microgreens have a mild and sweet earthy flavor, closely similar to spinach and beets.
Are Swiss chard microgreens healthier cooked or raw?
Swiss chard microgreens are healthier when consumed raw. Because heat reduces the nutrients in any microgreens.
Is perpetual spinach the same as swiss chard?
Essentially a Swiss chard variety, perpetual spinach looks and tastes more like spinach.
So, Are You Ready to Grow Swiss Chard Microgreens?
Thanks to our “Swiss Chard Microgreens – The Complete Guide” you don’t need to spend hours researching swiss chard microgreens and how to grow them. You have everything you need to get started all in one place.
Even the links to the products!
Not taking precautions while growing microgreens indoors can lead to mold growth or seed hulls inhibiting your microgreens’ growth. Also, ensure that you don’t store them wet or they will go damp and lose all their color and texture.
Just follow this guide from start to end and you are all set.
Now you have everything you need to get started with swiss chard microgreens.


